
Free Ableton Live Template: How I Built My Default Set
Aug 28, 2026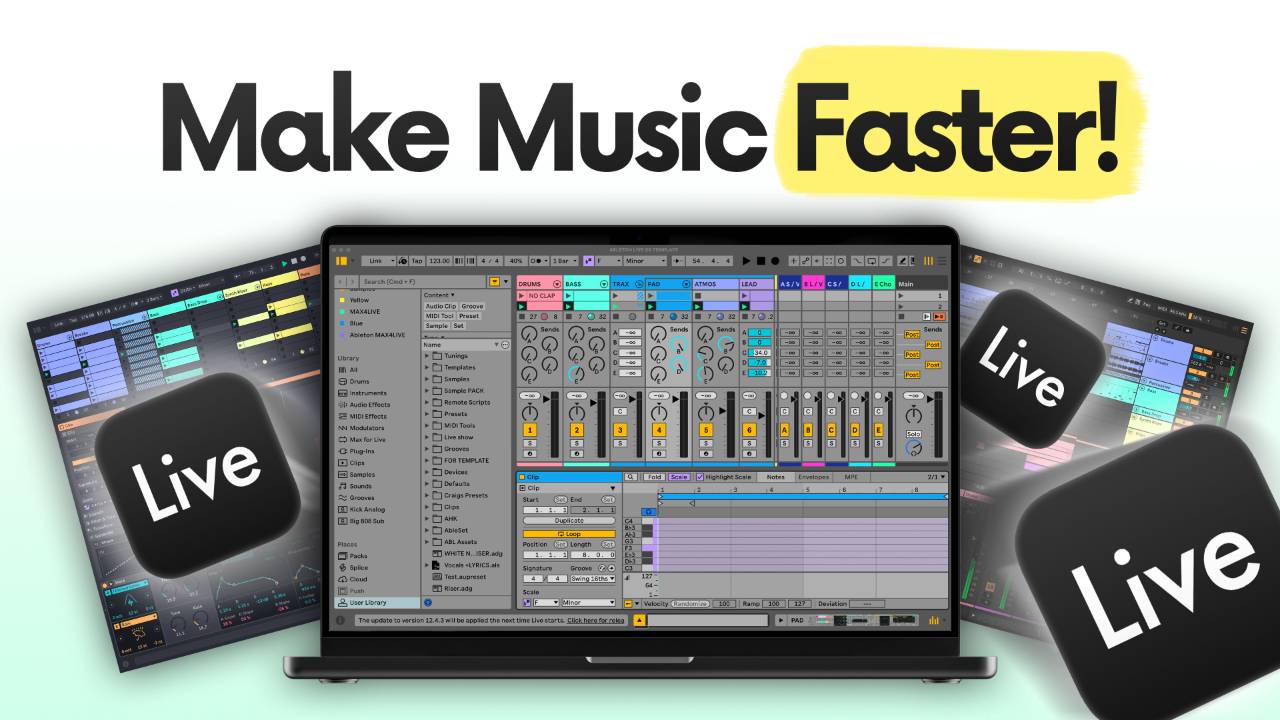
This article shows you how to build an Ableton Live template you can trust, and gives you mine as a free download.
We'll look at how the template is put together track by track, from drum rack snapshots and Drift sounds through to a sidechain that is already routed and a complete master chain, and how to save it as your default set so it is there every time you open Live.
It took me years of trial and error to get this template into the shape it is in now, and it is the starting point I use to get ideas going around a full-time job and a family.
By the end of this article, you'll know exactly what is in the template, why every setting is where it is, and how to make it your own default set.
Let's get to it.
Key Takeaways from this Ableton Live template
- The template is built so you can get an idea down fast. Everything you need to sketch a track is loaded in the session, so you are never off searching for presets or samples in the browser while the idea fades.
- The drum racks live as snapshots inside an instrument rack, with chain select mapped to a macro. You switch kits while a clip is playing without leaving the session.
- Every synth sound is built on Drift, and those run on snapshots too. Same idea as the drums, you flip between synth sounds without leaving the session.
- The empty loop tracks each have a Utility at minus 8 dB at the start of the chain. Splice loops slot into your mix at a sensible level the moment you drop them in.
- A master chain is set up on the main track. Your sketch feels clean and finished right from the start.
- Save it with File, Save Live Set as Template, then once you have tweaked it, File, Save as Default Template. Every time you open Ableton Live, it is there straight away.
What is in the free Ableton Live template
The idea is simple.
The template is built to make music fast.
Everything you need to sketch an idea is loaded, so you never scroll through the browser and lose the idea while you look.
Here is what is in the set.
A drums track with an instrument rack full of my favourite stock kits.
A folder of sound tracks called pad, Atmos and lead, all running Drift.
A bass track.
A sidechain trigger track that is already routed.
A group of loop tracks for anything you pull in from a sample library.
An audio in track with a stock channel strip on it.
5 return tracks and a full chain on the main track.
The default tempo is 123 BPM.
The default key is F minor.
123 is a nice place to start, and it beats the 120 you land in with Ableton's own default set.
F is a good key to start in for electronic music because the fundamental of the sub sits where it sounds fat across most speakers.
Every device in the template is stock Ableton.
There are no third party plugins, so the download opens clean on any machine running Live.
The download is free and you can grab the template here.
Grab it, open it up and go through it alongside this article.
Drum rack snapshots so you never open the browser
The drums track has an instrument rack with a set of snapshots on it.
Each snapshot is one of my favourite stock Ableton drum racks.
Rather than searching through presets every time, I press play on a clip and switch between kits without leaving the session.
Here is how it is built.
Each drum rack sits on its own chain inside the instrument rack.
The chain select is mapped to a macro.
Each snapshot moves that macro to a different chain, so switching snapshots switches kits.
Adding your own kit takes a minute.
Drag a drum rack from the browser into the instrument rack, say the 505 Core Kit.
Move it onto its own chain.
Set the chain select macro to point at it.
Press New in the snapshot list to save it, then Command R on Mac or Control R on Windows to rename it TR505.
Now it sits alongside the others and you can flick to it while a clip plays.
I have made one change to the stock kits.
The kick in the 909 Core Kit never sat right for me, so I have swapped it for a kick sample tuned to F.
It sounds a lot fuller, in my opinion.
The drums track also has 2 MIDI clips waiting.
The first is called no clap.
It is four to the floor with an open hat on the offbeat, which is the classic dance beat.
The second is called clap, and it adds the clap on 2 and 4.
I work in electronic dance music most of the time, so some version of this beat is going to be in whatever I make.
Having it there means I am not searching for sounds or working out a beat when an idea arrives.
I press a clip and there is a beat.
Using Drift snapshots instead of presets
Double-click the pad track and you'll find an instance of Drift.
Drift ships with every version of Ableton Live, from Lite through Intro and Standard to Suite.
It is easy to use and it sounds fantastic.
In my opinion it is one of the best synths in the box.
The pad track works the same way as the drums.
Instead of presets, it uses snapshots.
Scrolling through Ableton's preset list is where ideas die.
With snapshots sitting on the rack, you can play a clip and step through sounds one after another.
The pad snapshots are named dark, pluck, drama, airy and slow.
If you get close to a sound and want to change it, tweak the filter or push the attack up, press New, and you have a new variation sitting underneath the others.
If you want to build the same thing on the lead track, which has a single Drift preset in it, the routine is short.
Select Drift and press Command G to put it inside an instrument rack.
Click Map and map every control you might want to change to a macro, the filter for a start.
Press New in the snapshot list, then Command R to name it.
Repeat for every variation you want.
The empty clips on the pad and bass tracks are not a mistake.
Each one is set to a 2 bar grid, so a single note lasts 2 bars.
The scale is folded and highlighted, so only notes in F minor show.
Chords in electronic dance music tend to last 2 bars, so a chord sequence goes in quickly.
If you find it hard making chords or chord progressions, I have a 4 step method for writing chord progressions in Ableton Live with no music theory needed, and the folded scale in these clips is the same starting point.
The Atmos track is another instance of Drift with a few modulation effects, a delay and a reverb after it.
There is a single drone note in it, in F.
Change the note if you are working in another key.
It sits over the top of a sketch and adds a bit of tension.
Bass and sidechain compression ready to go
The bass track has 2 macros.
Filter controls brightness and darkness.
Pluck controls how long the note sustains.
Turn pluck down and you get a short stab.
Turn it up and the note holds.
It is a good all round bass, and there are no snapshots on it by default, so add your own as you find sounds you like.
You'll also see a compressor on the bass track that looks like it is doing nothing.
That is on purpose.
It is a sidechain compressor, and its input is the sidechain trigger track next to it.
The same trigger is routed into compressors on the track group and the loop group.
Every one of those compressors has its threshold sitting at 0, so nothing happens until you ask for it.
When you want a bit of pump, click on the bass, pull the threshold down and it starts ducking straight away.
Do the same on the track group and the whole sketch moves with the kick.
That is the point of the whole template.
If you wonder what an idea sounds like with sidechain, it is 1 fader away rather than 5 minutes of routing away.
Loop tracks with gain staging built in
The next group of tracks is called loop tracks.
They look like blank audio tracks.
There is 1 device hiding on each one that does more than it seems.
Double-click a loop track and you'll find a Utility at the start of the chain set to minus 8 dB.
Loops from sample libraries, especially Splice, tend to come in hot.
They arrive loud, and the temptation is to turn everything else up to meet them.
With the Utility first in the chain, every loop drops 8 dB the moment it lands.
Any audio effect you add after it sees a sensible level, so you avoid gain staging problems before they start.
It mixes for you without you noticing it is there.
There is also an EQ on the loop group.
It clears out the low end and dips around 2 kHz, where shakers and busy percussion loops tend to pile up.
The loop tracks are empty in the download.
I can't legally distribute the loops I use, they are not mine to hand out.
And if we all used the same loops, all our music would sound the same.
The idea is that you fill them with your own.
If you reach for the same percussion or drum top loops again and again, put them in here and they are ready every time.
If your Splice downloads and half-finished loops are scattered everywhere, how I organise the Ableton Live 12 browser covers where I keep them so they are ready to drop into these tracks.
The last track in the set is an audio in.
It has Ableton's stock channel strip audio effect rack on it, with gain, high pass, low pass, gate, mid and compression.
If you are recording a voice, a guitar or a bass, the basics are already there.
I can't take credit for that one, it is a stock rack.
Return tracks in the Ableton Live template
There are 5 return tracks.
The first is a short reverb.
It does not sound like reverb in the usual sense.
There is no tail.
It sounds like the room got a bit bigger.
Send a percussion element to it and it tucks behind the drums, so you get a layered feel without hearing an effect.
I use it more like a mixing utility than an effect.
The second is a long reverb.
This is the one for leads, pads and anything ambient.
The lead in my sketch has a lot of it.
The third and fourth are a short delay and a long delay, and the long one is wider.
The last is a chorus.
I generally keep a chorus on a send for basses and other mono instruments.
A little of it adds width without changing the sound.
The master chain in the Ableton Live template
The main track has a complete chain on it.
The first 2 devices are switched off by default.
They are both Utility devices in mid/side mode.
Right-click the middle dial to get to it.
1 is set to 100 percent mid, the other to 100 percent side.
Turn on the mid one and you hear the mix in mono.
Turn on the side one and you hear only the sides.
It is a fast way to check for phase problems.
Next is an EQ Eight in mid/side mode.
The mid channel has a small boost around 86 Hz.
The side channel has a lift in the upper mids and highs, and a cut in the lows.
That takes the sub out of the sides and keeps it in the middle, where it belongs.
Then a Glue Compressor with a slow attack and a quick release.
The sidechain filter is on, so the low end is taken out of the signal the compressor listens to.
Click the headphone icon to hear what it is reacting to.
You only want to be tickling the needle.
Adjust the threshold until it bounces a little on the loud parts and no more.
Last is a Limiter.
Release is on auto.
The sides are unlinked and it is set to standard.
The ceiling is at minus 1.5 dB.
Turn the input up until it sounds horrible, then back it off until it does not.
That keeps you clear of clipping without thinking about it.
How to save the Ableton Live template as your default set
Once you have downloaded the template, the first job is to save it as a template inside Live.
Go to File, then Save Live Set as Template.
Choose Copy.
It now appears under Templates in the browser and you can pull it out at any point.
Then make it yours.
Add your own drum kits as snapshots.
Build your own Drift variations.
Put your go to loops in the loop tracks.
When it is tweaked and you are happy with it, go to File, then Save as Default Template.
From then on, every time you open Ableton Live, this is what is there waiting for you.
A whole set of decisions is already made, and you can start making music fast.
The template is 1 piece of a bigger system.
It is the system I use to get ideas going and turn them into full tracks around a full-time job, family and life.
I call it Ableton OS, and this template slots straight into it.
Final Thoughts on the free Ableton Live template
Building a template is not glamorous.
It is a set of small decisions made once so you never make them again.
Tempo, key, drums, sounds, sidechain, gain staging, returns and a master chain, all sitting there before you have played a note.
That is what lets me sit down and have something sounding decent in a few minutes.
Download the template, save it as your default set and make it yours.
If you want the full method for turning a sketch like this into a finished track, with mixing and mastering covered, that is what the Ableton Live 12 course is built for.
To see everything mentioned in this article in action, you can do so in this video here.
Frequently Asked Questions about Ableton Live templates
Where are Ableton Live templates stored?
Custom templates live in the User Library, in a folder called Templates.
On a Mac that is Users, your username, Music, Ableton, User Library, Templates.
On Windows it is Documents, Ableton, User Library, Templates.
Anything you drop in that folder shows up under Templates in Live's browser, and opening one creates a fresh untitled set so the original is never touched.
If you have moved your User Library to another drive, look there instead.
Live's Preferences, Library tab shows the current path.
What is the difference between a template and the default set in Ableton Live?
The default set is the 1 session that opens automatically every time you launch Live.
You only get 1 of them.
A template set is any saved starting point you can open from the browser whenever you choose, and you can have as many as you like.
The workflow in this article does both.
Save the download as a template first so you always have a clean copy, then once you have made it yours, save it as the default so it is there on launch.
Does the free Ableton Live template work in Live Lite or Intro?
Every device in it is stock, and Drift, the synth every sound is built on, ships with all editions of Live from 11.3 upwards, including Lite and Intro.
So the sounds and the racks open as intended.
The 1 thing to check is track count.
Lite and Intro cap the number of tracks in a set, so if your version has fewer slots than the template needs, delete the tracks you will not use and save it as your default from there.
How do I reset the Ableton Live default set back to factory?
Open the browser, click Templates, right-click on DefaultLiveSet.als and choose Set Default Live Set.
Live goes back to its factory starting point, 2 audio tracks, 2 MIDI tracks and 2 returns.
Your custom template is not deleted by this.
It stays in the User Library under Templates, so you can open it any time or set it as the default again later.
On older versions of Live the same job is done from Preferences, File Folder, Save Current Set as Default, then Clear.
Does using an Ableton template limit creativity?
It can if the template is full of finished parts you keep reusing.
That is why the loop tracks in this download are empty and the clips on the pad and bass tracks have nothing in them.
The template makes the decisions that are the same every time, tempo, key, routing, gain staging, returns and the master chain, and leaves every musical decision to you.
The point is to remove the setup that gets between you and the idea, not to write the idea for you.
Can I use this Ableton Live template in Live 12?
Yes.
The template is built and saved in Live 12, and every device in it, Drift, Drum Rack, Utility, EQ Eight, Glue Compressor and Limiter, is a stock Live 12 device.
There are no third party plugins to install and no missing device warnings on open.
If you are on Live 11.3 or later it should also open, since Drift arrived in 11.3, but Live 12 is the version it was made in.
About the Author
Craig Lowe is a professional touring playback engineer, Ableton Live specialist and educator based in the UK.
He has over 10 years of teaching experience, online at Push Patterns and at universities including ICMP, BIMM, ACM and ThinkSpace Education.
His Ableton programming credits include Sam Fender, Melanie C, Years & Years and Skunk Anansie.
He runs Push Patterns, where over 1,000 students have learned to produce and perform with Ableton Live, at pushpatterns.com.
If you are interested in learning Ableton Live 12 or the Push 3 in a bit more detail, check the course here:
